Build your own Gatsby blog template

As a Software Developer with over 7 years of experience in web development, I possess a high level of proficiency and creativity. I am dedicated to continuously improving my skills and knowledge in order to excel in my field.
In this tutorial, I'll guide you through the process of building your very own Gatsby blog template from scratch. You'll be able to create a performant and modern blog that is fully customizable, and you'll also gain valuable web development skills throughout the process.
To help you get started, I have a complete demo site and source code repository on GitHub for a final project written in TypeScript. However, in this blog post, I'll take a more beginner-friendly approach and walk through the step-by-step process of building a basic Gatsby blog template from scratch.
This will allow you to grasp the fundamentals and gain a solid understanding of how to create your own customizable blog using Gatsby
So let's get started 🐱🏍
Part I: Build a Gatsby site
1. Prerequisites
Before diving into the tutorial, it's essential to have Node.js and npm (Node Package Manager) installed on your machine. Make sure you have a minimum version of 18.0.0 or higher, as recommended by the official documentation, to ensure compatibility and smooth execution of the steps outlined in this tutorial.
You can download them from the official Node.js website.
2. Install Gatsby CLI
To create a new Gatsby project, we need to install the Gatsby CLI globally. Open your terminal and run the following command:
npm install -g gatsby-cli
This will install the Gatsby CLI, which we will use to create and manage our Gatsby project.
3. Create a New Gatsby Project
Now that we have the Gatsby CLI installed, we can create a new Gatsby project. Run the following command in your terminal:
gatsby new my-gatsby-website
This will create a new Gatsby project in a directory named my-gatsby-website with the default starter template and will also install some dependencies that we will use in our website.
4. Start the Gatsby project
Change the directory to your newly created Gatsby project:
cd my-gatsby-website
Next, let's start the development server with the following command:
gatsby develop
You can now view your Gatsby site in the browser using the http://localhost:8000/ link
5. Create your page
In Gatsby, pages are created using React components. Let's create a simple about page for our website.
Create a new file src/pages/about.js and add the following code:
import React from "react";

const AboutPage = () => {
  return (
    <div>
      <h1>Welcome to my Gatsby website!</h1>
      <p>This is a blazing-fast website built with Gatsby.</p>
    </div>
  );
};

export default AboutPage;
Now, if you'll go to http://localhost:8000/about/ you'll see your page created 👏
6. Add SEO to our page
For this step, we'll use the Gatsby Head API which will allow us to modify the <title> and <meta> tags on our pages, along with anything else we might want to change in our <head>. It's similar to react-helmet or other solutions but is easier to use, and has a smaller bundle size.
The Gatsby starter has already an SEO component that can be used on our pages and we'll make it easier to update all our meta tags.
Let's update the About page (src/pages/about.js) to use the SEO component with some values:
import React from "react"
import Seo from "../components/seo"

const AboutPage = () => {
  return (
    <div>
      <h1>Welcome to my Gatsby website!</h1>
      <p>This is a blazing-fast website built with Gatsby.</p>
    </div>
  )
}

export const Head = () => (
  <Seo title="About" description="More information about this site." />
)

export default AboutPage
7. Add global and scoped styles to our page
To load global styles, all we have to do is import our new global stylesheet in src/components/layout.js similar to the existing import "./layout.css"
import * as React from "react"
import { useStaticQuery, graphql } from "gatsby"

import Header from "./header"
import "./layout.css"
// new global stylesheet:
import "./style.css"

const Layout = ({ children }) => {
  ...
}

export default Layout
When it comes to maintaining consistent styles across a global website, using a global stylesheet is a practical option for site-wide elements like colors and fonts.
However, when it comes to styling components, it can be challenging to prevent style clashes, especially as the codebase and development team grow.
Scoped CSS, such as CSS Modules, can be incredibly helpful in addressing this issue. While there are various approaches like CSS-in-JS, CSS Modules are particularly straightforward to implement, especially in Gatsby where support is built-in. By simply naming the CSS file with a .module.css extension, Gatsby automatically enables scoped CSS for components, making it easier to manage styles without conflicts.
Let's create a scoped style for our About page. Create a new folder called styles in the src folder of your Gatsby project if it doesn't exist, and inside src/styles we can add our about.module.css
.content {
  margin: 3rem auto;
  max-width: 80rem;
}
And inside our about page we'll import our about.module.css style and use the scoped class styles.content for our wrapper div component:
import * as styles from "../styles/about.module.css"
...

return (
    <div className={styles.content}>
      <h1>Welcome to my Gatsby website!</h1>
      <p>This is a blazing-fast website built with Gatsby.</p>
    </div>
  )
Part II Build a Gatsby Blog
1. Install markdown plugins
npm i gatsby-transformer-remark gatsby-remark-images gatsby-remark-prismjs prismjs
gatsby-transformer-remark will make all your markdown files readable by Gatsby, gatsby-remark-images allows you to process and optimize images in your markdown files. It automatically takes care of tasks such as resizing, compressing, and lazy loading images, which can help improve the performance of your Gatsby site.
gatsby-remark-prismjs is another plugin for Gatsby that enhances code blocks in your Markdown files with syntax highlighting using prismjs, a lightweight and extensible syntax highlighter. gatsby-remark-prismjs automatically detects the language of the code block and applies syntax highlighting accordingly, making your code snippets more visually appealing and readable on your Gatsby site.
To use it in our project we'll also have to add it to our plugins list from gatsby-config.js
module.exports = {
  siteMetadata: {
    siteUrl: "https://gatsby-blog-theme-starter.netlify.app/",
    title: "Gatsby Blog Theme Starter",
    description: "A Gatsby Blog Theme",
    image: "",
  },
  plugins: [
    ...
    {
      resolve: `gatsby-transformer-remark`,
      options: {
        plugins: [
          {
            resolve: `gatsby-remark-images`,
            options: {
              maxWidth: 1200,
            },
          },
          `gatsby-remark-prismjs`,
        ],
      },
    },
  ],
}
2. Update folder structure inside the Gatsby project
At the root of your Gatsby project, we'll create a content folder for our markdown files, and inside that folder, create a new folder called blog. Here we'll be saving all our blog posts.
├── src
│   ├── ...
├── content
│   ├── blog
│   │   ├── ...
We'll have to save this new folder structure to our gatsby-config.js file with the help of gatsby-source-filesystem plugin that is already installed:
module.exports = {
  siteMetadata: {
    ...
  },
  plugins: [
    ...
    // leave the existing gatsby-source-filesystem as it is
    {
      resolve: "gatsby-source-filesystem",
      options: {
        name: "images",
        path: `${__dirname}/src/images`,
      },
    },
    // add this config for our blog folder
    {
      resolve: `gatsby-source-filesystem`,
      options: {
        path: `${__dirname}/content/blog`,
        name: `blog`,
      },
    }
  ],
}
3. Create a Markdown Blog Post
Inside our content/blog folder we'll create another folder for our first blog post with the following folder structure:
├── content
│   ├── blog
│   │   ├── my-first-blog-post
│   │   │   ├── index.md
│   │   │   ├── image-for-my-first-blog-post.jpg
And the blog post will have a basic markdown file:
---
title: My Example Blog Post
date: 2023-02-12
tags: ["example", "markdown", "blog"]
author: John Doe
---
## Heading 2
**This is bold text**
_This is italic text_
> This is a blockquote.
This is a regular paragraph. It may include inline code `console.log("Hello, World!");` and links [Visit Google](https://www.google.com).

The top part of the markdown file with the title, date, tags and author is called frontmatter, which is a special part of Markdown and MDX files that adds additional data that won't be displayed on the page. We'll use this data to add metadata like the post date and SEO tag values.
The bottom part is the content of our blog post.
4. Create a Layout for a markdown Blog Post
In a markdown file, we can't add props to the layout component. That means we need a bit of special handling for our blog posts to make sure the title and description make it through to the layout.
Create a new component at src/components/blog-post.js with the following code:
import React from "react"
import Layout from "../components/layout"
import { graphql } from "gatsby"

const BlogPostTemplate = ({ data: { markdownRemark: post } }) => {
  return (
    <Layout>
      <div>
        <h1>{post.frontmatter.title}</h1>
        {post.frontmatter.author && (
          <div className="authors">By: {post.frontmatter.author}</div>
        )}
        {post.frontmatter.date && (
          <div className="posted">Posted: {post.frontmatter.date}</div>
        )}

        <hr />

        {(!post.html || post.html.length === 0) && (
          <p>This post has no content</p>
        )}

        {post.html && post.html.length !== 0 && (
          <article
            dangerouslySetInnerHTML={{ __html: post.html }}
            itemProp="articleBody"
          />
        )}
      </div>
    </Layout>
  )
}

export default BlogPostTemplate

export const pageQuery = graphql`
  query BlogPostBySlug($id: String!) {
    markdownRemark(id: { eq: $id }) {
      id
      frontmatter {
        author
        date(formatString: "MMMM DD, YYYY")
        title
      }
      html
    }
  }
`
5. Create blog pages dynamically
At this moment, if we'll add a new markdown to our content/blog the page will not be generated by Gatsby since its default config will only generate pages from js/tsx files found in src/pages folder.
However, we can leverage the Gatsby Node APIs to programmatically create blog pages from our markdown files found in the specified folder.
For this to work we'll have to edit the existing gatsby-node.js file:
/**
 * Implement Gatsby's Node APIs in this file.
 *
 * See: https://www.gatsbyjs.com/docs/reference/config-files/gatsby-node/
 */

const path = require(`path`)
const { createFilePath } = require(`gatsby-source-filesystem`)

/**
 * @type {import('gatsby').GatsbyNode['createPages']}
 */
// Create blog pages dynamically
exports.createPages = async ({ graphql, actions }) => {
  const { createPage } = actions

  // Get all markdown blog posts sorted by date
  const result = await graphql(`
    {
      allMarkdownRemark(sort: { frontmatter: { date: ASC } }, limit: 1000) {
        nodes {
          id
          fields {
            slug
          }
        }
      }
    }
  `)

  if (result.errors) {
    reporter.panicOnBuild(
      `There was an error loading your blog posts`,
      result.errors
    )
    return
  }

  const posts = result.data.allMarkdownRemark.nodes

  if (posts.length > 0) {
    posts.forEach(post =>
      createPage({
        path: post.fields.slug,
        component: path.resolve(`./src/templates/blog-post.js`),
        context: {
          id: post.id,
        },
      })
    )
  }
}

/**
 * @type {import('gatsby').GatsbyNode['onCreateNode']}
 */
exports.onCreateNode = ({ node, actions, getNode }) => {
  const { createNodeField } = actions

  if (node.internal.type === `MarkdownRemark`) {
    const value = createFilePath({ node, getNode })

    createNodeField({
      name: `slug`,
      node,
      value,
    })
  }
}
Great job 🎉 now you can add markdown files in your Gatsby site that we'll be served as web pages in the browser.
Note: To test your progress on your localhost, have in mind that you have to restart the develop process after the list of plugins is updated.
If that's all you're looking for and you're not interested in a UI admin to edit your blog posts, you can skip the next part and go directly to deploy your static blog site.
Part III Add a static CMS to your Gatsby site (optional)
1. Install StaticCMS
Install @staticcms/app and gatsby-plugin-static-cms packages in your project, with the following command:
npm i @staticcms/app gatsby-plugin-static-cms
And add the gatsby-plugin-static-cms in the plugins list from gatsby-config.js
module.exports = {
  siteMetadata: {
    ...
  },
  plugins: [
    ...
    'gatsby-plugin-static-cms'
  ],
}
2. Configure Static CMS
Create a new static/admin folder at the root of your Gatsby project and inside your admin folder, create a new file called config.yml.
├── src
│   ├── ...
├── static
│   ├── admin
│   │   ├── config.yml
This config.yml file will contain the configuration for Static CMS. Here's an example:
backend:
  name: git-gateway
  branch: main # Branch to update (optional; defaults to main)

media_folder: static/images
public_folder: /images

collections:
  - name: "blog"
    label: "Blog"
    folder: "content/blog"
    create: true
    slug: "index"
    media_folder: ""
    public_folder: ""
    path: "{{title}}/index"
    editor:
      preview: false
    fields:
      - { label: "Title", name: "title", widget: "string" }
      - { label: "Author", name: "author", widget: "string" }
      - { label: "Publish Date", name: "date", widget: "datetime" }
      - { label: "Tags", name: "tags", widget: "list", default: ["news"] }
      - { label: "Body", name: "body", widget: "markdown" }
This configuration sets up StaticCMS to use GitHub as the backend, specifies the folder for media uploads, and defines a collection called "blog" with 5 fields: title, author, date, tags and body.
You can also add other fields to your UI admin, you can look on the official docs for all available options.
3. Publish your changes and final check
Please ensure that you push all the changes from your Git repository so that we can use them for deploying on Netlify.
Just to be extra sure, you can also check your project by restarting your gatsby develop process and check for any errors in the terminal.
After you restart the develop server you should see a similar message in your terminal:
Static CMS is running at http://localhost:8000/admin/
Also, you can check for build errors by running gatsby build or npm run build to build your Gatsby project.
Now you should be good to go for the final part 💪
Part IV a: Deploy your Gatsby static blog with a CMS
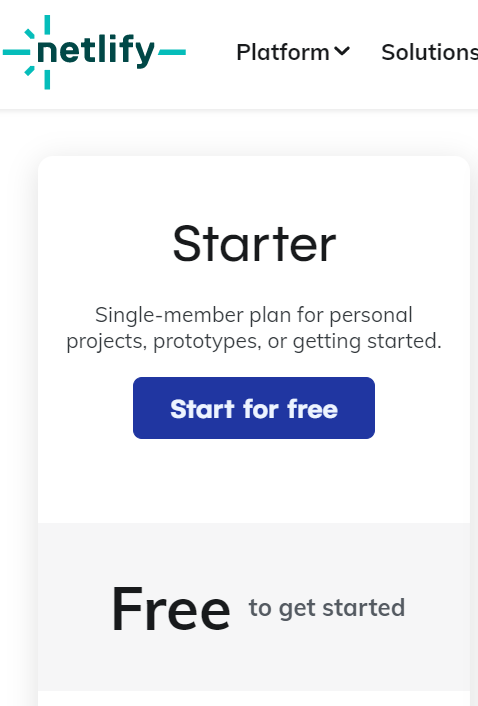
1. Sign up for a Netlify account
The first step is to create a Netlify account, and you can choose the free tier option:
2. Deploy your git project on Netlify
From the Netlify admin panel, go to the Sites section, Add new site and select Import an existing project:
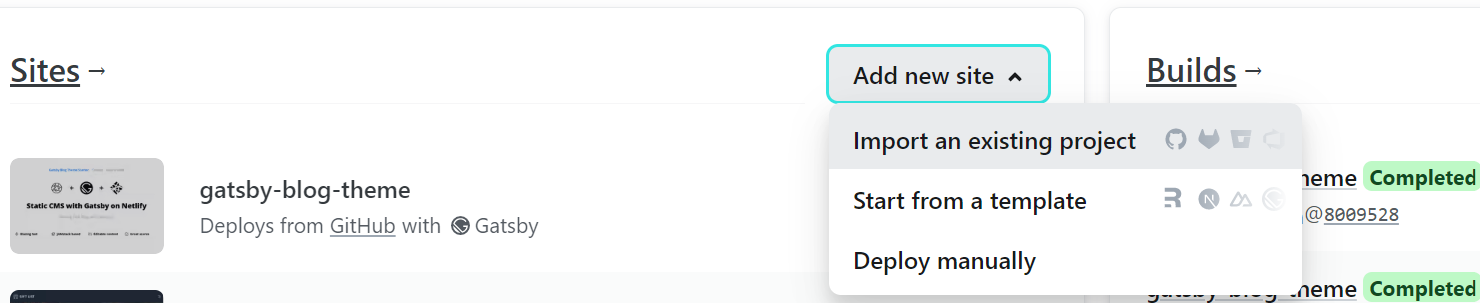
This will open a 3-step helper that will guide you to deploy your Gatsby project from a git repo.
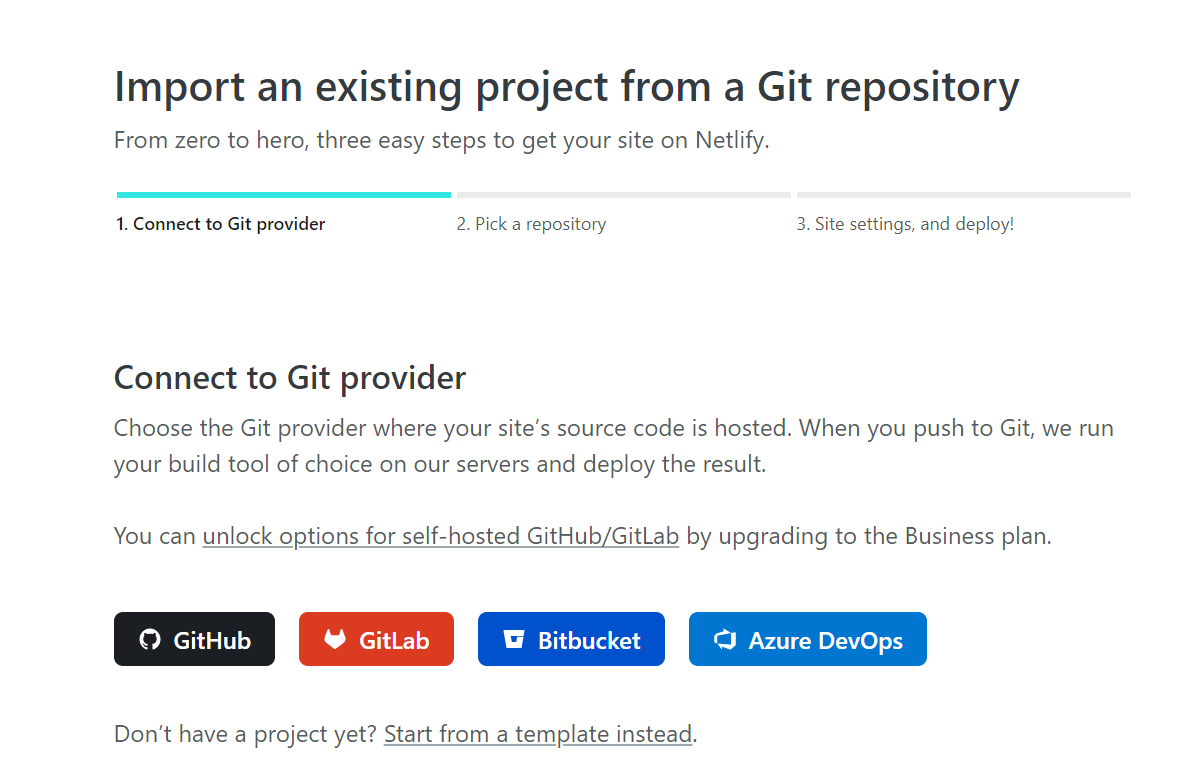
In the first step you'll have to select the git provider:
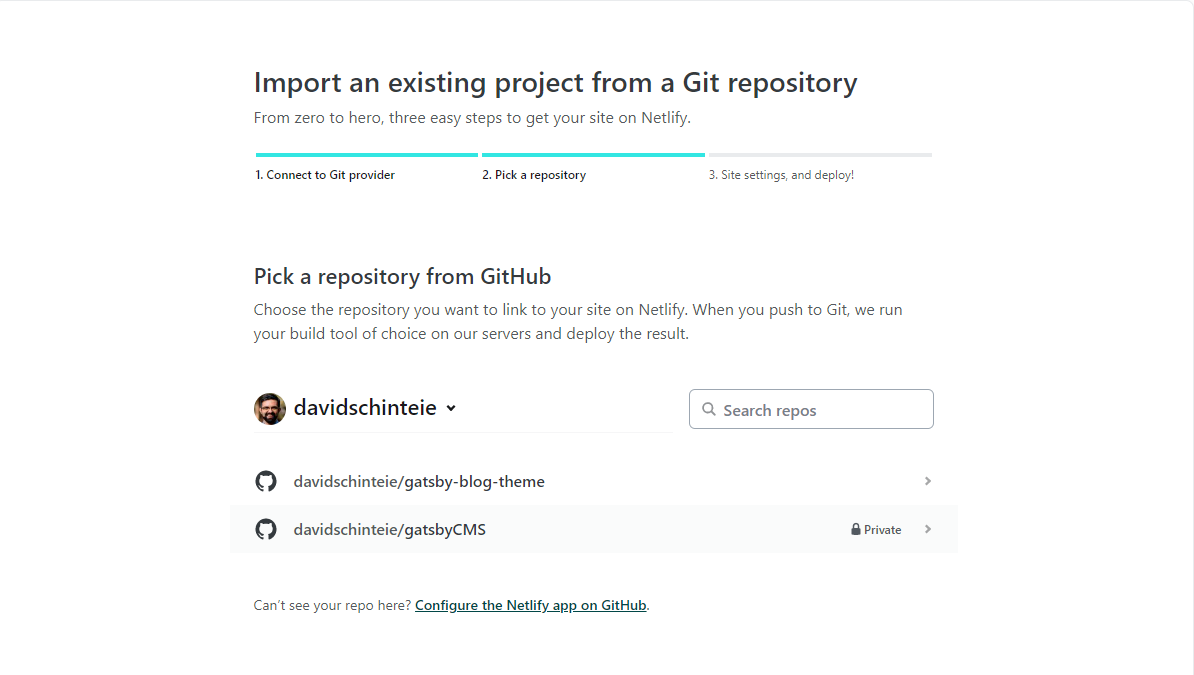
Then select the repo that you want to deploy:
On the final step, you'll be prompted with all the final details and at the bottom of the page you can click on the Deploy button.
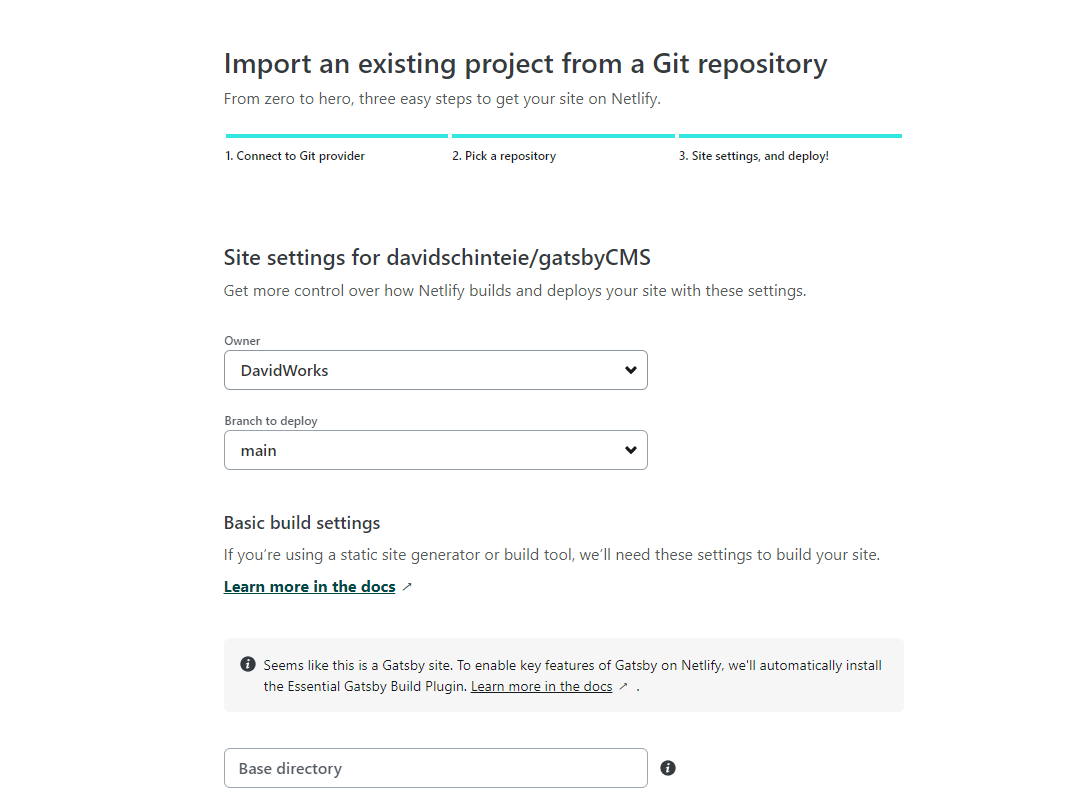
In the end, you'll notice the new project being deployed by Netlify: Site deploy in progress
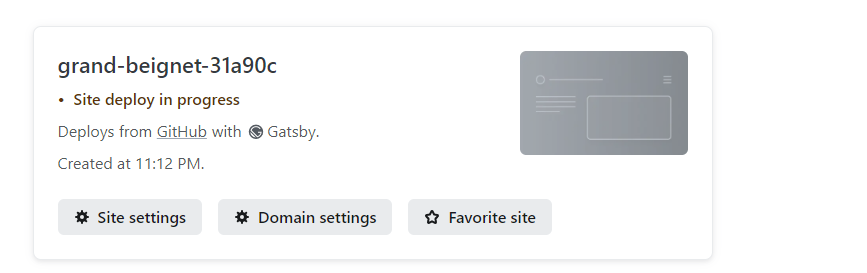
Note: That's all you have to do If you are okay with editing your blog posts using markdown files on your GitHub account instead of a UI admin. Your static blog is now live and with all your changes from the GitHub repo we'll trigger your Gatsby site to be rebuilt by netlify.
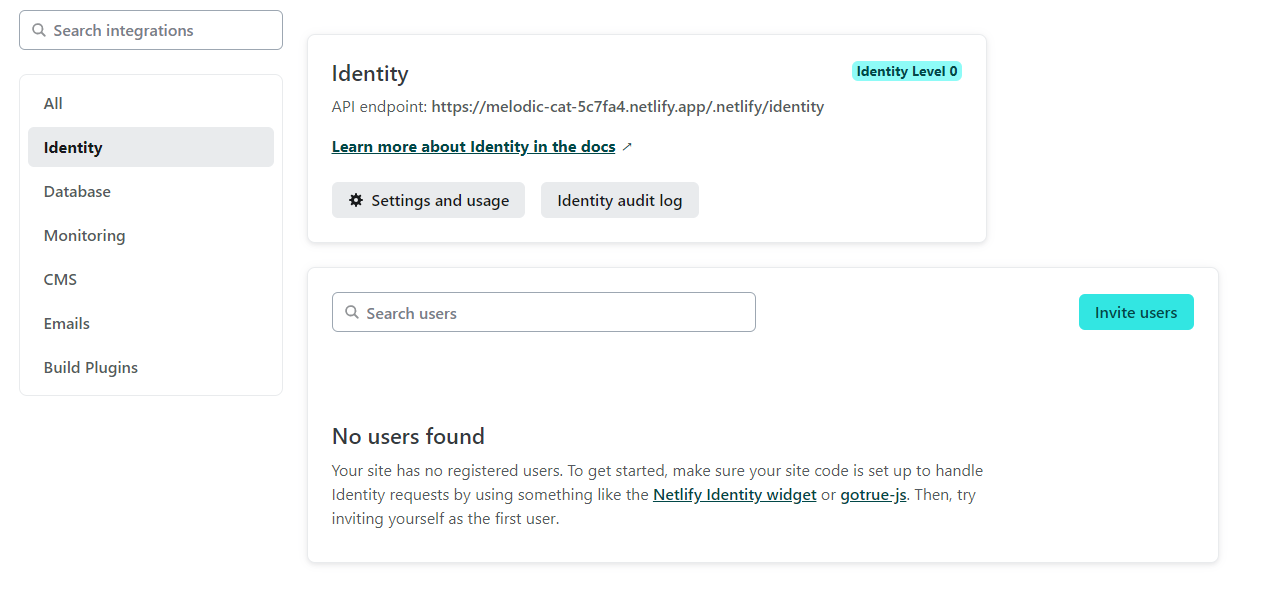
3. Enable Identity in your Netlify account
This step and the following ones will allow you to access your blog's admin panel.
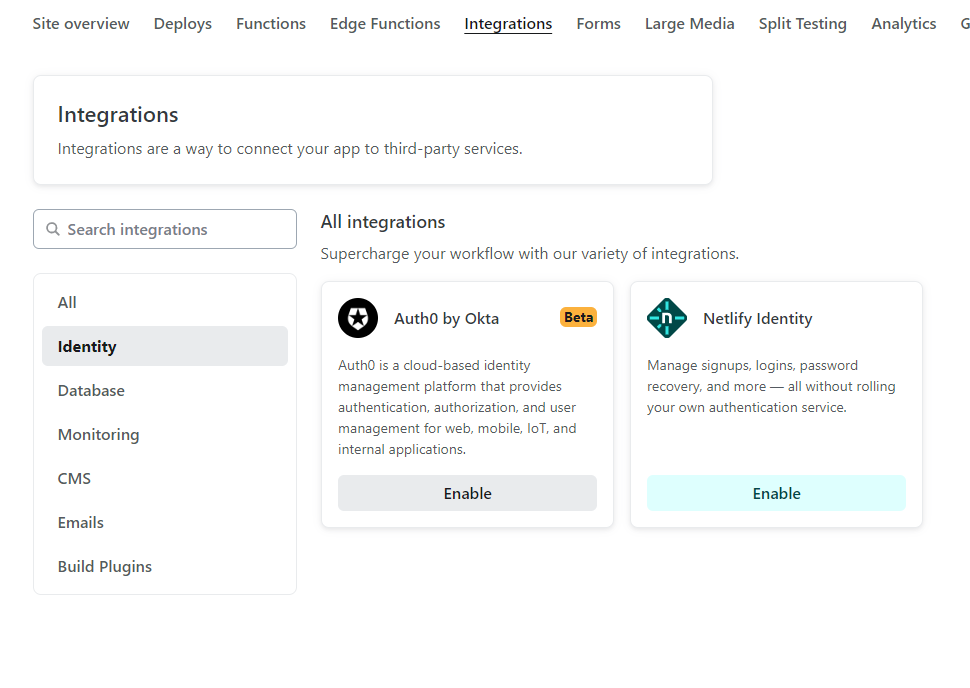
From the Netlify admin panel, go to the Integrations tab, search for Identity, and click on Enable.
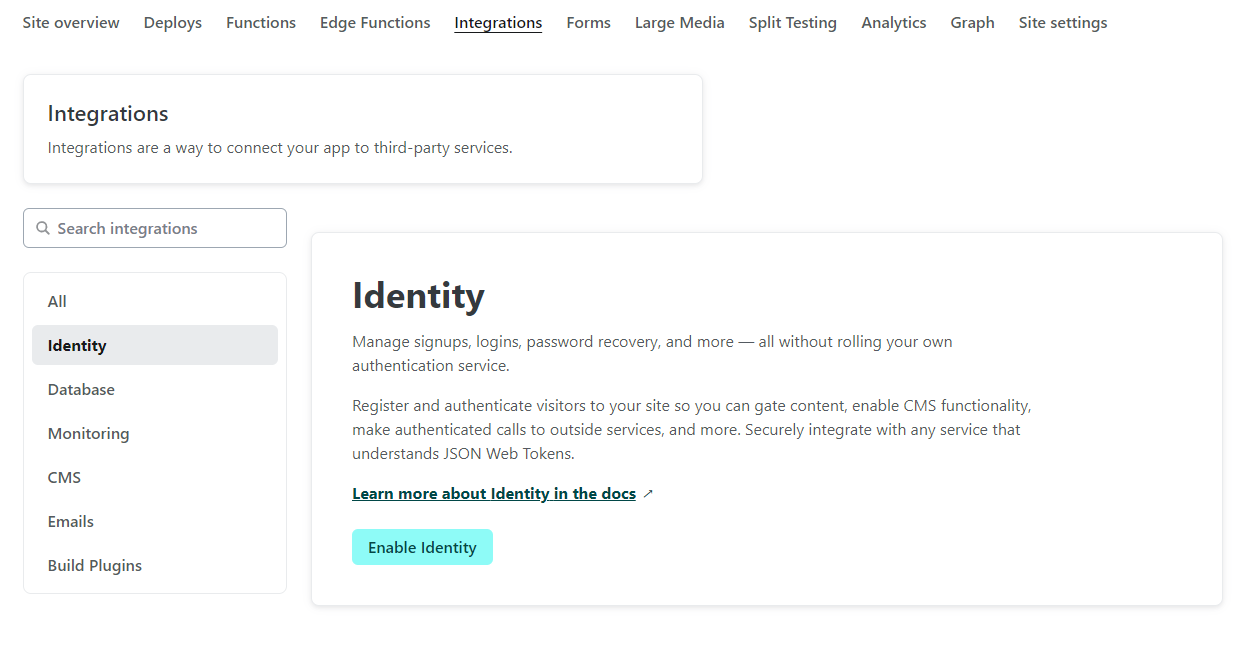
In the Identity section, select Enable Identity.
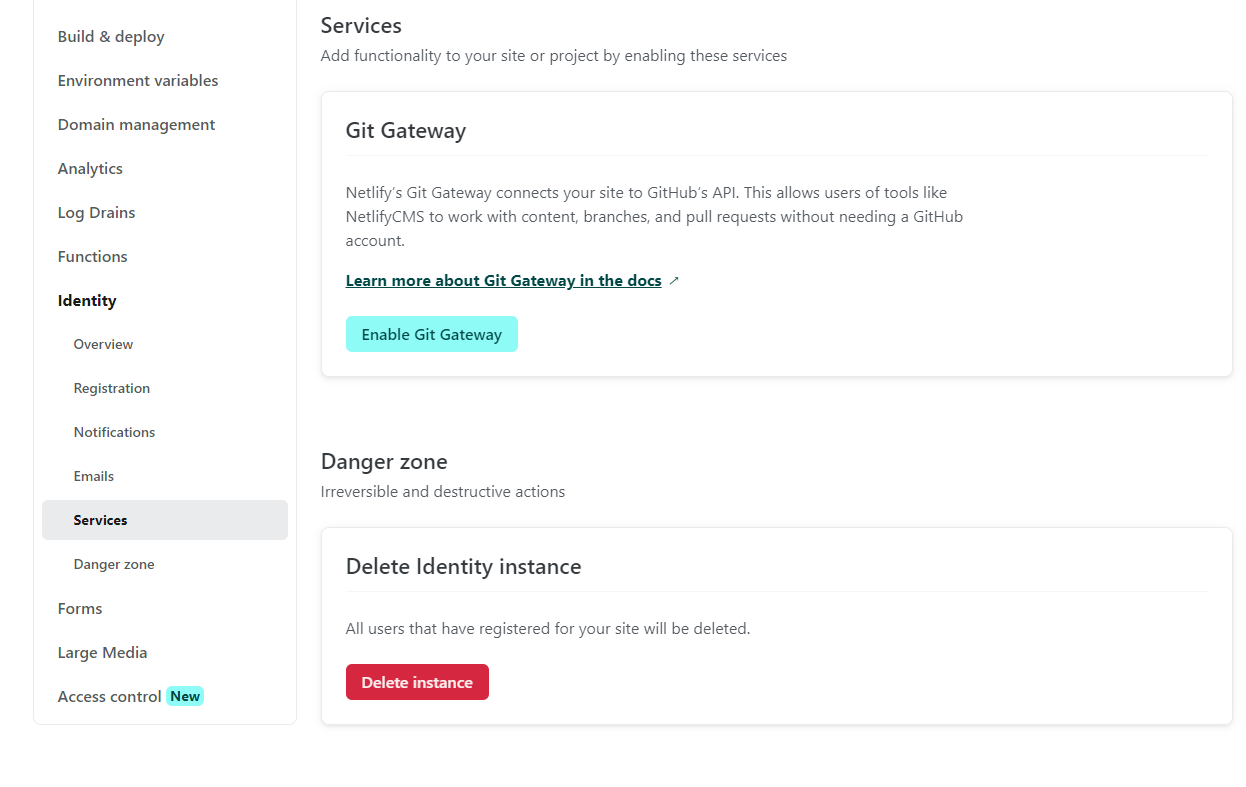
4. Enable Git Gateway in your Netlify account
You can enable Git Gateway after enabling the Identity service.
From the Netlify admin panel, go to Site settings, select Identity, search for Services, then Git Gateway, and click on Enable Git Gateway.
5. Configure your CMS credentials
At this point, you should be able to navigate to your site link (e.g. https://gatsby-blog-theme.netlify.app/) and your CMS admin (e.g. https://gatsby-blog-theme.netlify.app/admin).
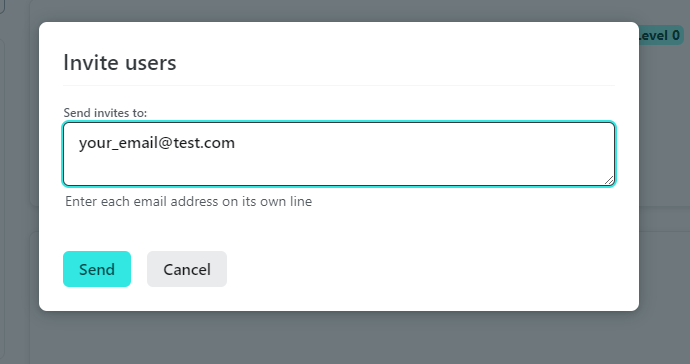
Now, let's add your email address for your CMS account:
Under the Netlify admin panel, go to Integrations, then Identity, and under Invite users, insert your email address and click on Send.
Check your email for a Netlify invitation that should look like this:
You have been invited to create a user on http://gatsby-blog-theme.netlify.app.
Follow this link to accept the invite:
Accept the invite
After clicking on the invite link, you should see the following screen:

Insert the desired password to access your blog admin.
Note: If the invitation link is broken, you can fix it by adding admin/ before #invite_token=** in the URL, like this:
before:   http://my-gatsby-site.netlify.app/#invite_token=****

after:    http://my-gatsby-site.netlify.app/admin/#invite_token=****
6. Your blog CMS is now live 🐱👤
Great job! Your blog link should now be live, and you should be able to edit your blog posts in the admin panel. 👏
Part IV b: Alternatives for static blog site with markdown files editing
If you are comfortable with modifying blog posts using Markdown files directly on your GitHub account instead of using a UI admin interface, there are multiple options you can choose from.
In this case, your CMS will be handled by GitHub and all we need to find is a way of delivering the Gatsby site to a public link.
Besides the Netlify option presented in the previous part (only step 1 and step 2 from part IV), here are some other popular options:
Github Pages allow you to deploy static websites or single-page applications (SPAs) from Github repositories, including support for custom domains and HTTPS.
Vercel is a popular platform for deploying websites and applications, and it provides Git Gateway functionality for GitHub repositories. Vercel's Git Gateway allows you to manage deployments, trigger builds, and configure webhooks based on GitHub repositories. You can also use a headless CMS with a static generated website like Gatsby deployed on Vercel.
Firebase Hosting, part of the Firebase suite of tools provided by Google, also supports Git Gateway integration with GitHub repositories. Firebase Hosting allows you to deploy and manage static websites or single-page applications (SPAs) directly from GitHub repositories.
AWS Amplify provided by Amazon Web Services (AWS), is a development framework that includes hosting capabilities for web and mobile applications. Amplify provides Git Gateway integration with GitHub repositories, allowing you to deploy and manage your Gatsby site based on GitHub repositories using AWS Amplify hosting services.
These are just a few examples of alternative services that you can use for your Gatsby site. It's important to evaluate and choose a service that best fits your specific requirements in terms of features, pricing, ease of use, and overall suitability for your project.
Final words
In conclusion, building your own Gatsby blog template from scratch can be a rewarding and educational experience.
You've learned valuable web development skills, from setting up a Gatsby project, creating pages and components, managing data with GraphQL, to deploying your blog template.
Don't hesitate to explore further and experiment with different features and plugins to make your blog truly unique.
Happy blogging with Gatsby! 🐱💻


